Last Updated on January 17, 2021 by Jose Barrios
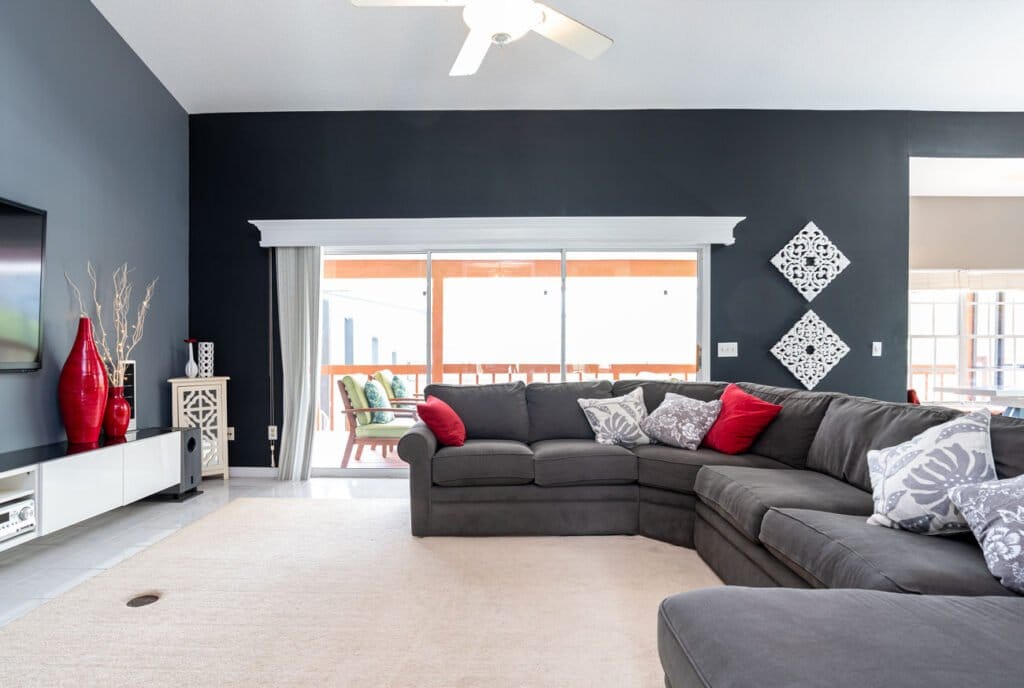
There comes a time in your real estate photography career when you want to do that perfect shot where everything inside the room is properly lit and the windows are not blown out.
HDR seemed to be the solution for a while, but the results were never quite convincing. Outside views always looked washed out and faded.
Another solution was to take two photos, one exposed for the inside and a second one exposed for the outside and then layer and mask in Photoshop. The problem with this method was the immense amount of time it took to mask out things like window blinds, objects, and everything else that stood in front of the window. This method did not make much business sense because of the time involved.
That’s why the Window Pull method came to be, simple, fast, and it makes business sense for non-high-end properties.
You need three things for a window pull:
Your camera set to RAW mode, ISO 400, and Aperture Priority.
Your camera should always be set to RAW. RAW files are more flexible because they will have the image’s full information, especially dynamic range, allowing you to correct dark or overexposed images in Lightroom.
Setting you ISO to 400 allows your Speedlight to be more powerful. By raising your ISO your camera needs less light allowing you to use your flash at a lower power setting. Your mileage may vary in this setting, to low an ISO and your flash might not light up the window enough, too high an iso and you introduce a lot of noise. You must play around with this setting and find your camera’s sweet spot.
Setting your camera to AP for doing window pull is sure to get me some criticism since most window pull guides go full manual for this. I have learned that my camera does a decent job when in AP allowing me to spend less time on-site, any issues that come up are easily corrected in Lightroom.
You can read more about camera settings in my guide here.
A camera remote and a sturdy tripod
A remote trigger and rock-solid tripod are essential in real estate photography. Most of your images are going to be composite photos, one layered on top of the other in Photoshop.
The less you touch your camera, the better and easier your job will be. In my experience, my Manfrotto tripod took an average of 30 minutes off my onsite time.
A flash with a remote trigger.
For real estate photos 90% of the time your flash will be handheld, especially if you are doing a window pull. For a window pull to come out right you must aim the flash at the window at about 45 degrees.
Taking the photos
1. – Place your camera on the tripod and use a remote
You are going to be staking your photos in Photoshop, so make sure that your camera does not move while taking the photos. You might also want to use manual focus to avoid camera movement.
2. – Set your camera to spot meter for a dark part of the room and take your first photo
Set your camera to meter for the dark areas of the room, this will result in a properly lit image but will make your windows be overexposed, blown out, this is OK, we actually want this to happen.
If you are doing a Flambient, this is the step where you would do it, just insert the Flambient here.

Properly lit room with overexposed windows
3. – Now set your camera to spot meter for the outside of the window
In this step you want to properly expose for the outside, just do not take your photo yet! We still need to deal with the flash.
4. – Set your flash to ½ or ¼ power, and aim it at the window
Make sure your flash is set to manual, not TTL, and set your power to either 1/2 or less. The power setting will vary depending on the flash model and manufacturer, so there is a bit of trial and error here. My recommendation is to take several photos at different power settings until you find your flash’s sweet spot.

Shot exposed for outside with flash overexposing window frame
In this shot, you can see how the flash is overexposing the surroundings of the window, like the frame, the curtain, and the couch, but it leaves the outside intact.
This step is strange but in the following steps, you will see why you need it.

How to place your camera and flash
Now let’s put it together in Lightroom and Photoshop
5. – Import photos into Lightroom
Bring your photos into Lightroom and apply lens corrections to the images. If you are going to adjust color temperature, this is the best time to do it, so try to get all your colors right before you export to Photoshop.
6. – Export photos to Photoshop as layers
Select both images, or more if you have them, and export to Photoshop as layers. A window pull can contain several images, case in point the sample photo I’m using was in reality two flash shots, one for the main windows and a second one not shown in this tutorial on the right.
7. – Auto-align layers in Photoshop
In my experience, your camera will always have a slight movement, after you have to touch in order to change your settings between shots.
These tiny movements, if left unaligned, will cause your photo to look blurred, so this step is vital, do not skip it.
8. – Place the Flash layer on top
Your flash layer (the dark one) has to be on top of the image that is exposed for the room.

9. – Select the flash layer and create an inverse mask
Select your top flash layer and create an inverse mask (the black one, Command + I (Mac ) | Control + I (Win)). If you have several windows with several flash shots, do the same for each one.
10. – Set the Flash(s) layer(s) to Darken mode
When you set the layer to darken mode what you are telling photoshop is to only show things that are darker than the layer below.
This is what makes this technique so unique. Instead of spending countless hours masking with polygon or pen tool the windows and all the elements in them like blinds, darken mode will now allow me to selectively just let what is darker to show through.
Remember that everything that is outside of the window is overexposed in the original photo, it is all blown out. We can now have the “darker” outside photo to show through.
11. Set your brush to white and paint out the window in the mask
Now to tie everything together, you can grab your brush and just paint the mask inside the window, since the elements that are in or around the window are blown out because of the flash, even if you paint outside the edges, they will not show because of the darken mode.
I know it sounds strange, but the best way is to try it out yourself, just download the images above and try them on your computer.
12. Flatten and save your image
You should now head back to Lightroom where your finished composite image will be waiting for you. You can apply any settings you like to it like vertical or play with the colors, it’s your choice.

And that’s it, you now have a window pull! Like anything else in life, practice makes perfect, and this method and camera settings work for me, but maybe you prefer something else, like going full manual on your settings.
There are probably (I’m pretty sure there is) better ways of doing this, but as always, time is of the essence, so you have to find a balance between what you are charging for your photos and how much time you spend on them
Another consideration is that window pulls are not for every shot. Sometimes you do not want to show what is outside, other times a blowout window actually looks good, it is up to you and your client’s expectations.
As always, hope this helps further your real estate photography business.

Jose Barrios
Photographer
“What can I say? I love taking photos of houses.”
Based in Orlando Florida, Jose is a real estate photographer specializing in vacation homes, working for realtors and property managers to make their properties look great. You can visit his site at JoseBarriosPhoto.com.


[…] is the standard in photo editing software. Photoshop allows you to create composite images like window pulls or flambients, it can fill in missing parts, you can clone, color correct, swap out grey skies, and […]
[…] complex images. You can introduce the use of flashes (no flashes in 360 cameras, you would see it), window pulls, flambients, etc. You are now able to composite images, use Photoshop, use Lightroom, you can do […]
[…] step requires a whole tutorial dedicated to it, but I will cover the basics. A window pull refers to a technique where you take a photo that is […]